
Forms in Excel
Protecting and unprotecting a worksheet
The default state of a worksheet is that it is unprotected. When you want to
create or edit a form, you need to make sure the worksheet is unprotected
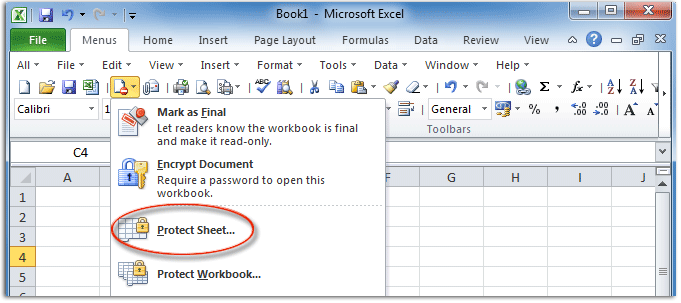
To turn on protection on a worksheet, follow these steps:
1. From the menu, choose Tools➪Protection➪Protect Sheet.
2. In the Allow Users of This Sheet To section, select the first two check
boxes, Select Locked Cells and Select Unlocked Cells.
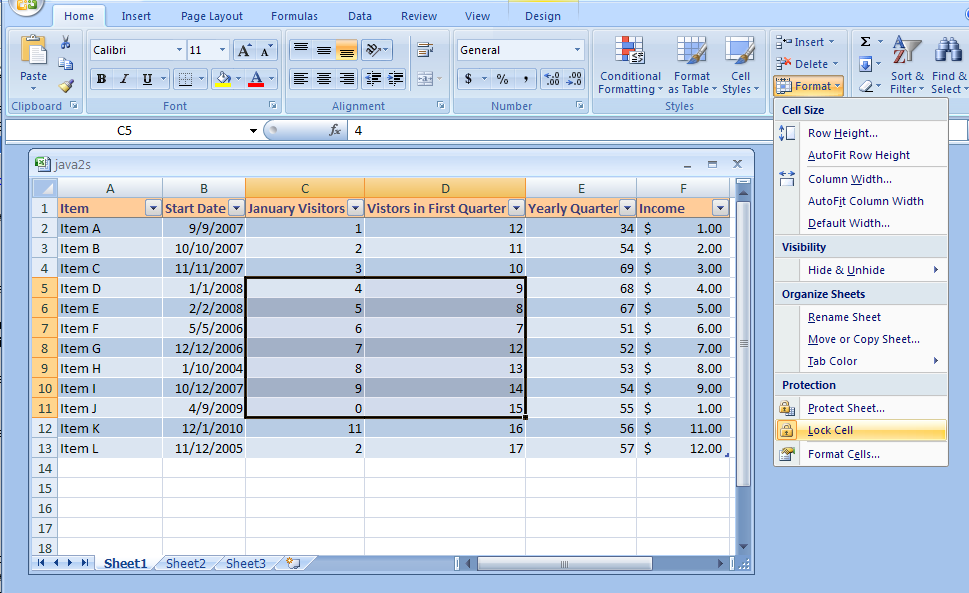
Locking and unlocking a cell
Unlock a cell by selecting it and then press Comand-1 to display the Format Cells
dialog. Click the Protection tab in the Format Cells dialog and then deselect the Locked option.

Making List boxes
Use a list box when you have a long list of items from which a choice is to be made.
To add a list box to your worksheet:
1. While your form is unprotected, click the List Box control (see left margin) on the Developer tab of the Ribbon.
2. Drag diagonally and then let go of the mouse.
An empty list box appears and is selected on your worksheet.
3. Right-click the new list box control and choose Format Control from the pop-up menu.
4. On the Control tab of the Format Control dialog, choose a range in a column that has the values you want to use to populate the control.
5. On the Control tab of the Format Control dialog, set a cell link by clicking into the empty Cell Link field and then clicking a cell on any worksheet.
6. On the Control tab of the Format Control dialog, choose a selection type.
Of the three selection types, only Single takes advantage of the linked worksheet cell. Multi and Extend selection types allow users to choose more than one item in your list box, but you need VBA to determine what was selected, which is beyond the scope of this book.
7. Deselect the Locked check box on the Protection tab of the Format Control dialog to unlock the linked cell.
The control won’t work when you protect the worksheet unless you unlock the linked cell.
8. Click OK to close the Format Control dialog.

Making a pop-up menu button
The official name of a pop-up menu in Excel is combo box.
here’s how to make a pop-up menu button:
1. While your form is unprotected, click the Combo Box control (shown in the margin) on the Developer tab of the Ribbon.
2. Drag diagonally and then let go of the mouse.
An empty pop-up menu button appears as selected on your worksheet.
3. Right-click the new menu button and choose Format Control from the pop-up menu
4. On the Control tab of the Format Control dialog, choose a range in a column that has the values you want to use to populate the control.
Don’t include the header; include only cells that contain data. Blanks don’t look right in a control; so make sure your data is contiguous.
5. On the Control tab of the Format Control dialog, set a cell link by clicking into the empty Cell Link field and then clicking a cell on any worksheet.
The linked cell is indicated in the Cell Link field in the dialog. This is where the results of the form user’s selection will display.
6. Click OK to close the Format Control dialog

Making an input field
An input field is simply an unprotected cell or merged cell. It’s an almost
trivial task to make an input field:
1. Select the cell that is to be the input field.
2. Click the Unlock button that you put on the Formatting toolbar.
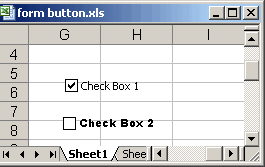
Making check boxes
Check boxes are handy things in surveys and questionnaires where multiple answers are provided and more than one choice is allowed. 1. While your form is unprotected, click the Check Box control on the
Developer tab of the Ribbon (shown in the margin).
2. Drag diagonally and then let go of the mouse.
A check box appears and is selected on your worksheet.
3. Right-click the new button and choose Format Control from the pop-up
menu.
The Format Control dialog displays, as shown in Figure 10-8.
4. On the Control tab of the Format control dialog, set a cell link by
clicking into the empty Cell Link field and then clicking a cell on any
worksheet.
The linked cell is indicated in the Cell Link field in the dialog.
5. Unlock the linked cell. The control won't work when you protect the worksheet unless you unlock the linked cell. Adjust other formatting options as desired.
Repeat Steps 1 through 4 for each Check Box control you want to add to
your worksheet.
Making More tools available
To display the Formatting toolbar, choose
View➪Toolbars➪Formatting. The Formatting toolbar displays beneath the
Standard toolbar.
Not
every control you need for working with forms is on the Developer tab of the
Ribbon; you can add the toolbar buttons you need to the Formatting toolbar
as follows:
1. With the Formatting toolbar visible, choose View➪Toolbars➪
Customize Toolbars and Menus.
The Customize Menus and Toolbars dialog displays.
2. Click the Commands tab.
3. In the Categories list, choose All Commands.
4. In the Commands list, drag the Lock Cell and Protect Sheet commands
to the Formatting toolbar.
5. When you’re finished adding commands to the Formatting toolbar,
click OK

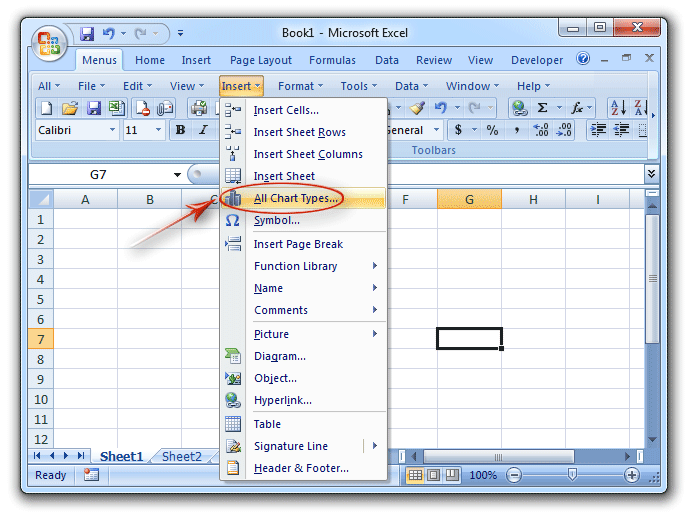
Displaying the Developer Tab
Excel’s form controls are not displayed by default. To see them, you must
display the Developer tab on the Ribbon. Here’s how:
1. Choose Excel➪Preferences➪Sharing and Privacy➪Ribbon.
Ribbon preferences display.
2. In the Customize section, scroll to the bottom of the Tab or Group
Title section and select the Developer check box.
3. Click OK to close Excel preferences.
Making a Form on a Worksheet
The form controls on the Developer tab of the Ribbon behave similarly in
some respects. To make a control, click its button on the Ribbon and then
drag diagonally on a worksheet. When you let go, the control appears.
Right-click a control to select it, To delete a control, select it and then press
the delete key.
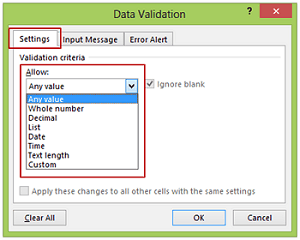
Restricting entry with data validation
By using data validation, you can
make sure that someone enters a particular kind of data (such as a date,
number, or text) into an input field. Follow these steps to use validation:
1. Select an input field.
2. Choose Data➪Validation. Or, on the Ribbon’s Data tab, go to the Tools
group and click Validate.
3. On the Settings tab, choose a setting from the Allow pop-up menu.
Data Validation is an interactive dialog — its options change depending
on what you decide to allow. You can allow the following:
• Any Value: Allow any character, word, number, or combination
• Whole Number: Apply logical operators and restrict entry to whole numbers.
Demical Number: Apply logical operators and restrict entry to
Radio Buttons
Radio buttons (also called option buttons) are similar to checkboxes, but you use radio buttons when only one of several choices is allowed.
Take these steps to make a radio button:
1. While your form is unprotected, click the Radio Button control (shown
in the margin) on the Developer tab of the Ribbon.
2. Drag diagonally and then let go of the mouse.
A radio button appears and is selected on your worksheet. Repeat Steps
1 and 2 for each radio button you need. If you don’t make the right number of controls, you can always make more of them or delete them
any time.
To change the text inside the button, click in the text. Drag over the text to
select it, and then start typing replacement text
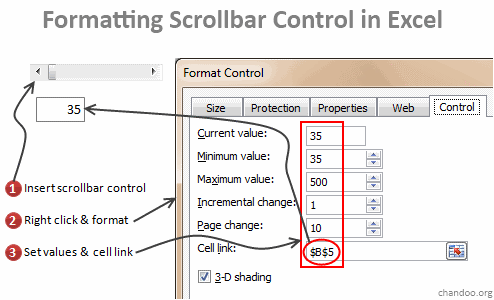
Making a scroll bar
Making a spin buton
The form user drags the scroll bar control left and right or up and down. As user drags the control, the number increases or decreases.
1. While your form is unprotected, click the Scroll Bar control (shown in the margin) on the Developer Ribbon.
2. Drag diagonally and then let go of the mouse.
A scroll bar appears as selected on your worksheet.
3. Right-click the new scroll bar and choose Format Control from the pop-up menu.
4. On the Control tab of the Format Control dialog, set a cell link by clicking into the empty Cell Link field and then clicking a cell on any worksheet.
The linked cell is indicated in the Cell Link field in the dialog. This is where the results of the form user’s selection will display.
5. On the Control tab of the Format Control dialog, use spinner controls
to adjust the following settings as desired:
• (Optional) Current Value: Set a default value. Displays the scroll bar’s current value if it has been changed on the form.
• Minimum Value: The number in the linked cell when the scroll bar is all the way to the left.
• Maximum Value: The number in the linked cell when the scroll bar is all the way to the right.
• Incremental Change: The incremental number for how much the number increases or decreases as the scroll bar is moved.
• Page Change: How much the value will change when a user clicks into the scroll bar itself, but not on the scrollbar’s drag button.
6. Click OK to close the Format Control dialog.
The spin button control is similar to the scroll bar control, but is always vertical.
1. While your form is unprotected, click the Spin Button control (shown in the margin) on the Developer tab of the Ribbon.
2. Drag diagonally and then let go of the mouse.
A two-button control appears as selected on your worksheet.
3. Right-click the new spinner control and choose Format Control from the pop-up menu.
4. On the Control tab of the Format Control dialog, set a cell link by clicking into the empty Cell Link field and then clicking a cell on any worksheet.
The linked cell is indicated in the Cell Link field in the dialog.
5. On the Control tab of the Format Control dialog, use spinner controls (just like the one you’re making!) to adjust the following settings to match your data source:
• (Optional) Current Value: Set a default value. If the default value has been changed by the form user, it displays the spinner’s current value when you display the Format Control dialog.
• Minimum Value: The lowest number in the linked cell when the spin- ner’s lower button is clicked repeatedly.
• Maximum Value: The highest number in the linked cell when the spin- ner’s upper button is clicked repeatedly.
• Incremental Change: The incremental number for how much the linked cell’s value increases or decreases when a spinner button is clicked.
6. Click OK to close the Format Control dialog.
w
Excel has a special kind of sheet called a dialog sheet, on which you can make an input form such as the one you see when you’re in an Excel table and choose Data➪Form.
Making a dialog sheet
Choose Insert➪Sheet➪Dialog Sheet to display a new, default dialog sheet cleverly called Dialog 1.
Running a dialog sheet
After you place controls onto a dialog sheet, you run the sheet to use the controls. There’s a catch! The Run button isn’t on the Ribbon or even in the Customize Toolbars and Menus dialog. You can find the Run button on the free Excel 2011 MVP Toolbar
✦Run Dialog: To make a dialog sheet work, you have to run it. Clicking this button runs the dialog while you’re building your form. Usually you exit a dialog using a control, but you can also press the Esc key. After you’ve finished making your dialog, you would have a macro run it. Developers tend to hide dialog sheets (Format➪Sheet➪Hide) and dis- play them only when they are needed.
✦ Design Mode: Click this toggle button to enter or exit Design mode.
✦ Edit Code: Select a control, and then click this button to view or edit the
VBA code associated with the selected control in the VB Editor (VBE).
✦ Control Properties: Select a control and then click this button to display the Format Control properties dialog for the selected control.
Placing a label
It’s just like a text box. You click the Label button on the Ribbon and then drag diagonally across the sheet. When you let go, you get a label, as shown in the margin. Click into the label, drag over the default text, and then type replacement text.