In our previous post, we saw how the rules for outlines determine the style rather than helping you to think about the content. We also saw how the “outline method” can still leave you staring at a blank page.
How can you structure a document to help the reader to read it, and help you to write it?
In this article, we will show you some techniques and tips, and some outlines examples that you can use to get started.
What is an outline?
In case you missed it, our previous post looked at how to write an outline and at some of the standard types of outlines. Full sentence outlines, topic outlines, outline numbering with Roman numerals, or numbering with Arabic numerals are all types of outlines.
Your readers have specific needs
The people who read your work have a list of wants and needs. Your task is to anticipate and deliver these. Even if you are not so good with words, the document structure still makes a big difference. A good structure also helps you to express your ideas.
Your readers usually have limited time. If your essay or document is not interesting to them, they may simply stop reading. They do not appreciate being made to read every word, hoping it will start to make sense.
Different people also have different perspectives and levels of interest. A manager may be looking for information to make a decision. A designer may be looking for ideas to help solve a problem. A user might be looking for a tutorial to learn how to do to something. A lecturer may be looking for precise formats using decimal outlines or Roman numerals.
Everyone will have some existing knowledge. Some may have a vague idea, and others may already be experts with strong opinions.
You need to accommodate these variations somehow.
Meeting your readers halfway
How you structure your document reflects how well you understand it yourself. A poor structure can work against you. Begin by being clear about who you are writing for and what they are likely to already know. Decide what you want them to do after reading your document.
Show your conclusions first, then follow them up with the supporting arguments and evidence afterward. Placing them to the end leaves room for the reader to draw their own conclusions. This might not be what you intended.
Present the most important ideas first. Can your document still achieve its purpose if someone reads only the first couple of pages? Will they learn enough to make a decision or take action? If it is a lecturer marking your essay, will they grasp your key points from the first page? If you want your reader to take an action, is that clear at the beginning?
If your document is intended for a variety of users, split it up into different sections. Each section is designed for a specific user and purpose. For example, use separate sections for novices, intermediate users, and advanced users. Your readers can then jump ahead to the section that suits them the best, without reading all of it.
If your document supports a variety of tasks, organize it by tasks under recognizable headings. For example, you could have sections for getting started, everyday activities, routine maintenance, and troubleshooting.
Introductions are important
The introduction to your document or essay is the most important part. If it is an academic essay, you may already have strict requirements for the abstract and introduction. But if it is something that people can choose to read, you will need to attract their interest. The introduction is the equivalent of your thesis statement. It summarizes your theory and what you aim to show with your document.
In her classic book “The Pyramid Principle“, Barbara Minto describes four steps to a clear introduction:
- Describe the current situation. This ensures that the reader identifies with the starting point for your arguments.
- Describe a complication. This is a new, unexpected, or unwanted factor that needs attention.
- Ask the key question: how can we resolve this complication? The reader will want to know what the answer is.
- Propose your answer. Summarize your main idea in the introduction. You can then explain it in the rest of your document.
This helps the reader to decide whether your document is going to be relevant and useful.
Create pyramid-shaped documents
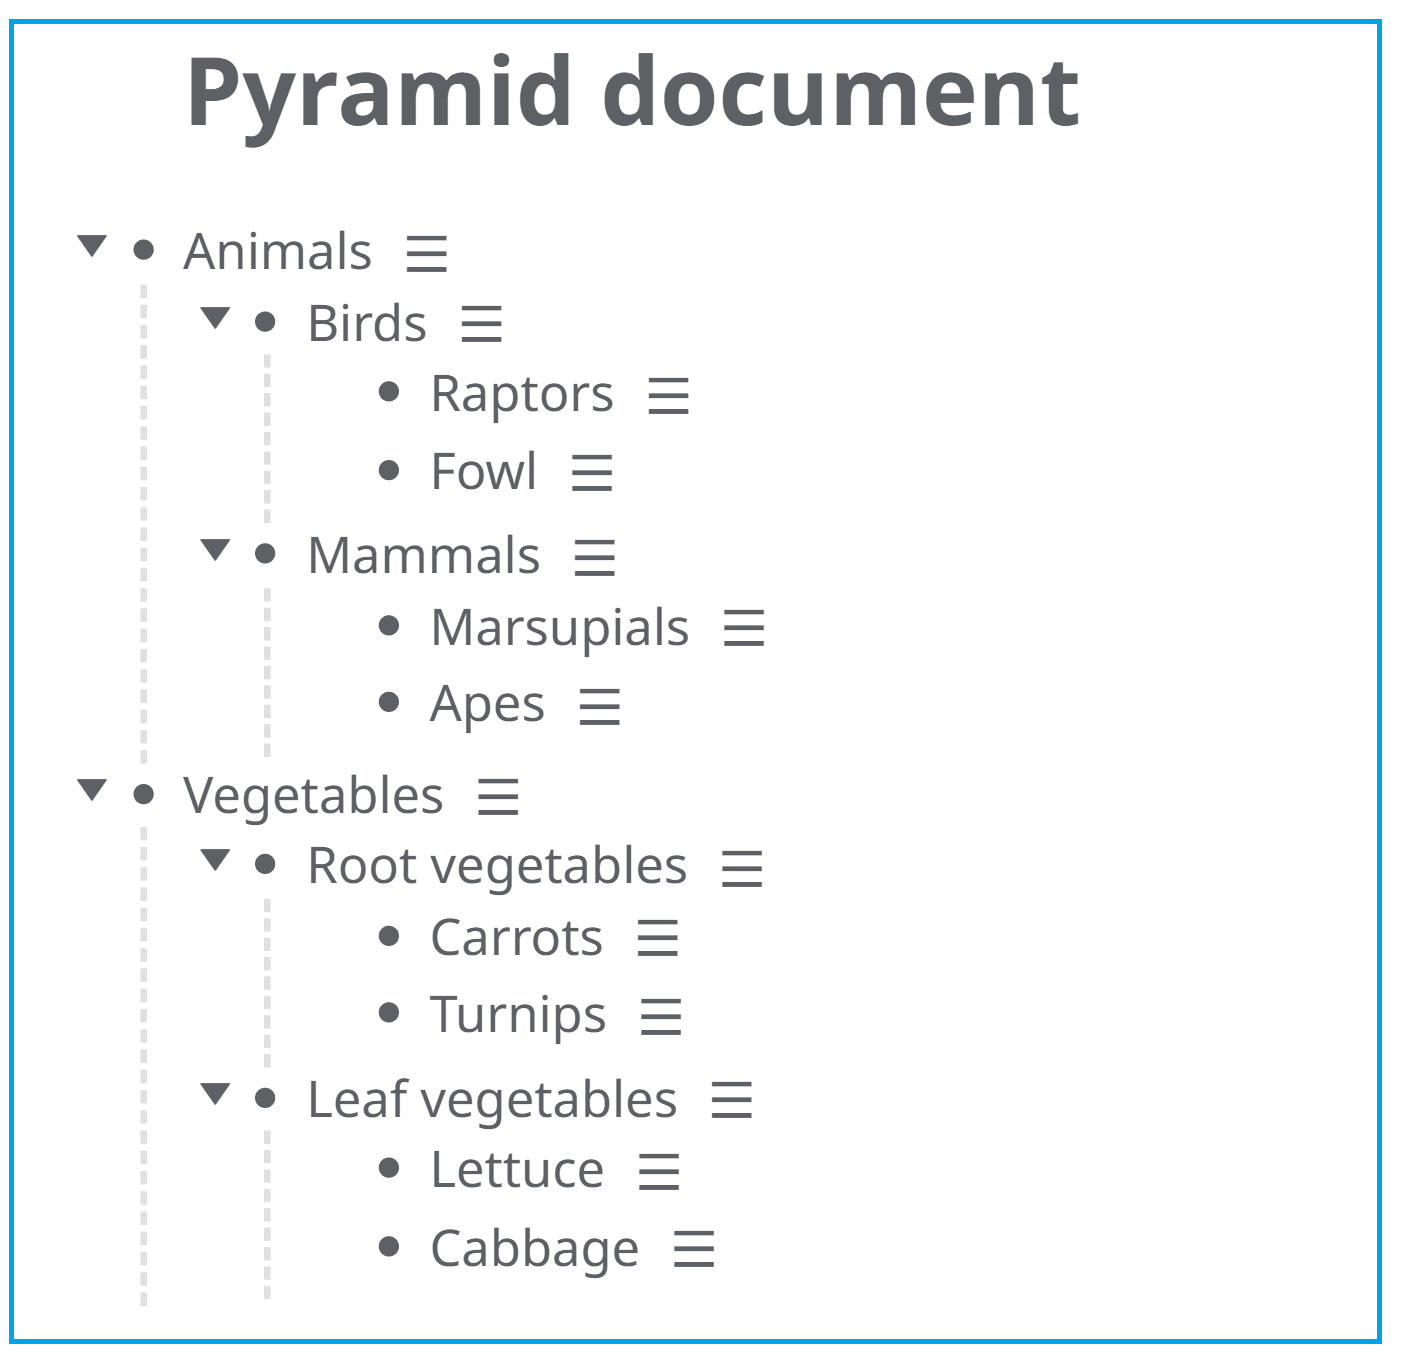
A “pyramid-shaped” document does not mean a literal pyramid. It refers to the order in which ideas are presented. Of course, you can also draw it as a tree, which perfectly suits a diagramming tool like Mindomo software.
In a pyramid of ideas, you present your biggest ideas at the top and explain them with evidence at the next level down.
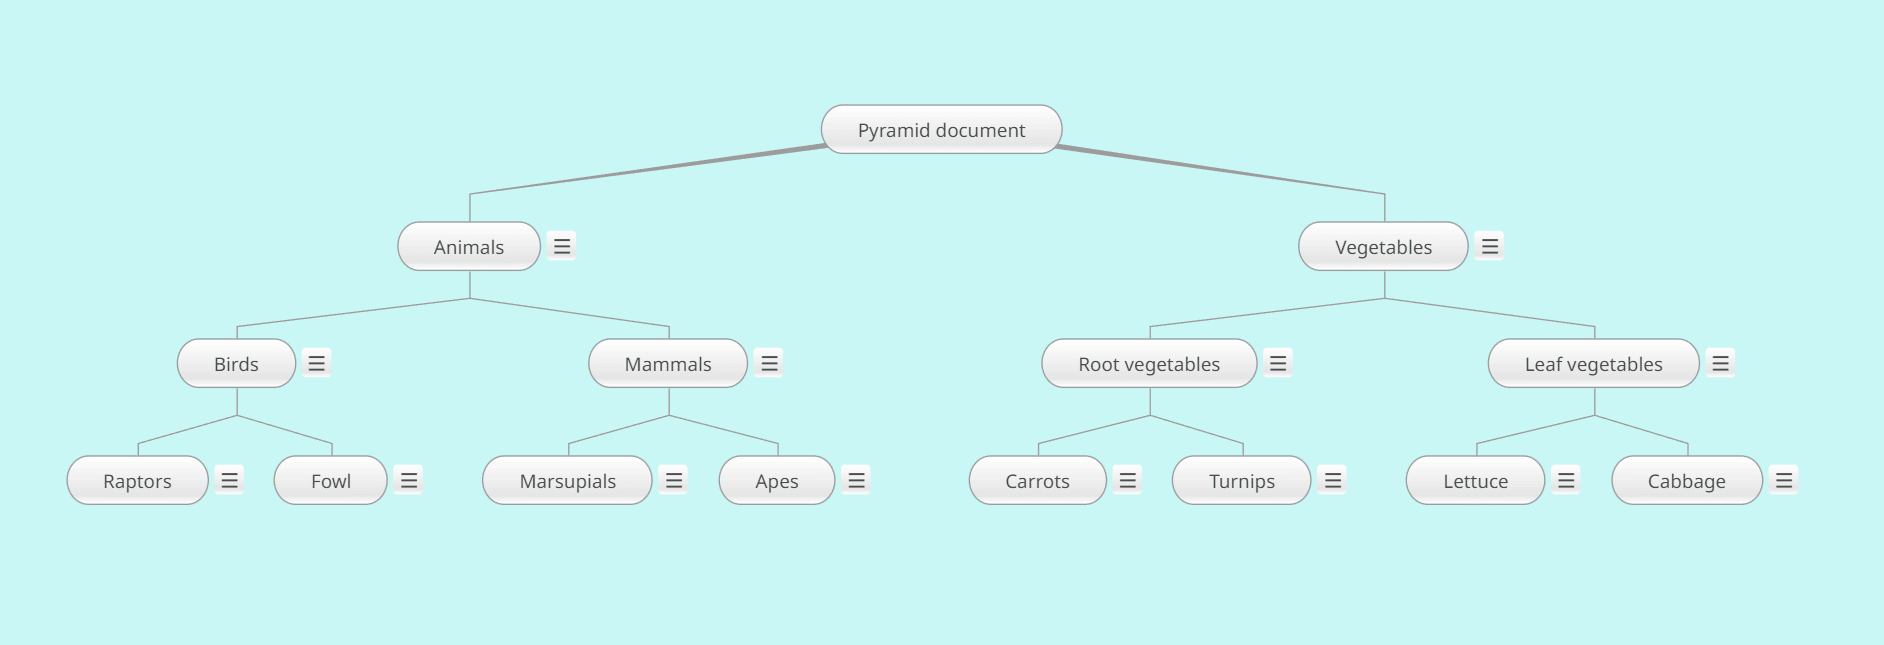
The flow of your document is from top to bottom and left to right in the pyramid. This helps busy people to grasp the basic ideas without reading them all.
From Minto’s “The Pyramid Principle”, ideas must obey three rules:
- An idea or statement must summarize the ideas below it, at the next level down.
- A group of ideas at the same level must be the same type of idea. A big idea should not be buried in the detailed explanation of something else.
- A group of ideas at the same level should follow some logical order that builds up understanding.
Outline software will help you to work with text outlines. Diagram software will let you draw it. But Mindomo combines both, making it easy to switch your work between a mind map diagram and an outline view.
Outline samples
Now let’s see some specific outline examples.
1. Sample outline: an academic essay
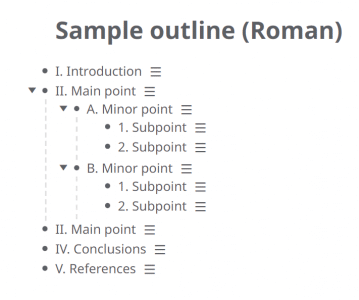
The outline below is a simple outline for an academic essay. This example outline shows some typical contents and structure.
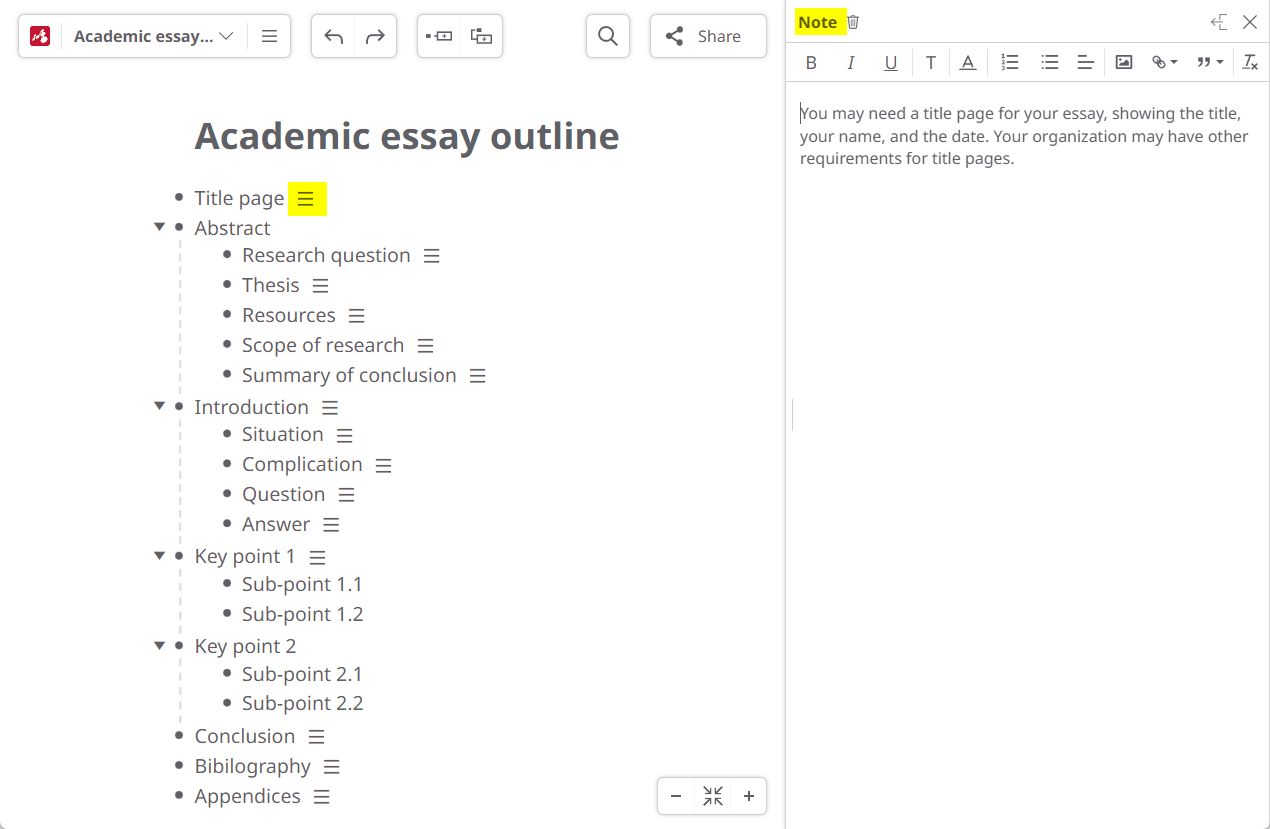
The paragraphs of text are included in the “topic note” for each item in the outline. In the screenshot above, the “Title page” topic is selected, and the text associated with this item are in the Notes pane on the right.
The abstract is the most important section, presenting your thesis statement and conclusions. Not only does this save the reader time in understanding your essay, but it will help you to stay focused on the rest of the text.
This outline is available as a template for you to explore and use for your own writing projects. Your organization may have given you instructions on how to make an outline for an essay. If not, you can use this as a starting point.
2. Sample outline: a technical report
Technical reports and research papers are often structured in the same way, regardless of the subject.
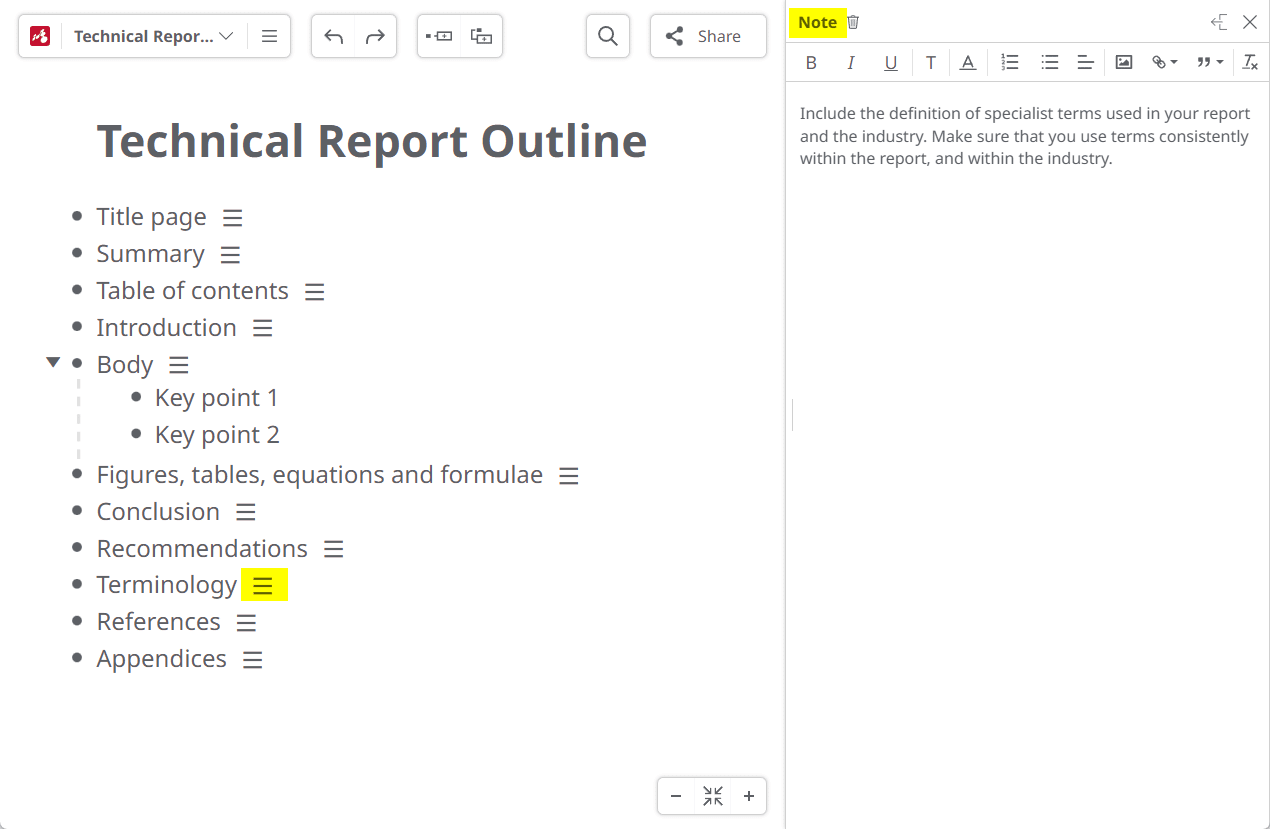
Like the essay, the summary is the key section. You may not need a thesis statement in a technical report, but it should give the reader the main conclusions and recommendations so that they do not need to read the whole report.
In the screenshot above, the “Terminology” item is selected, and the topic notes displayed belong to this item in the outline.
Unlike an essay, a technical report may be used as a reference document, where the reader wants to look up a specific item rather than read it from beginning to end. A table of contents will be useful, and you will probably use a “topic outline” instead of a “full sentence” outline, as the section headings will be used for navigation. Any detailed information such as tables of data or technical principles should be put in the Appendices. You should also be clear about terminology and give definitions for all the technical jargon used in the report. Make sure that you use the terms consistently.
This outline is available as a template for you to explore and use for your own writing projects.
Tip: how to create the table of contents
To create a table of contents in Mindomo, export to Word and check the option to include a table of contents.
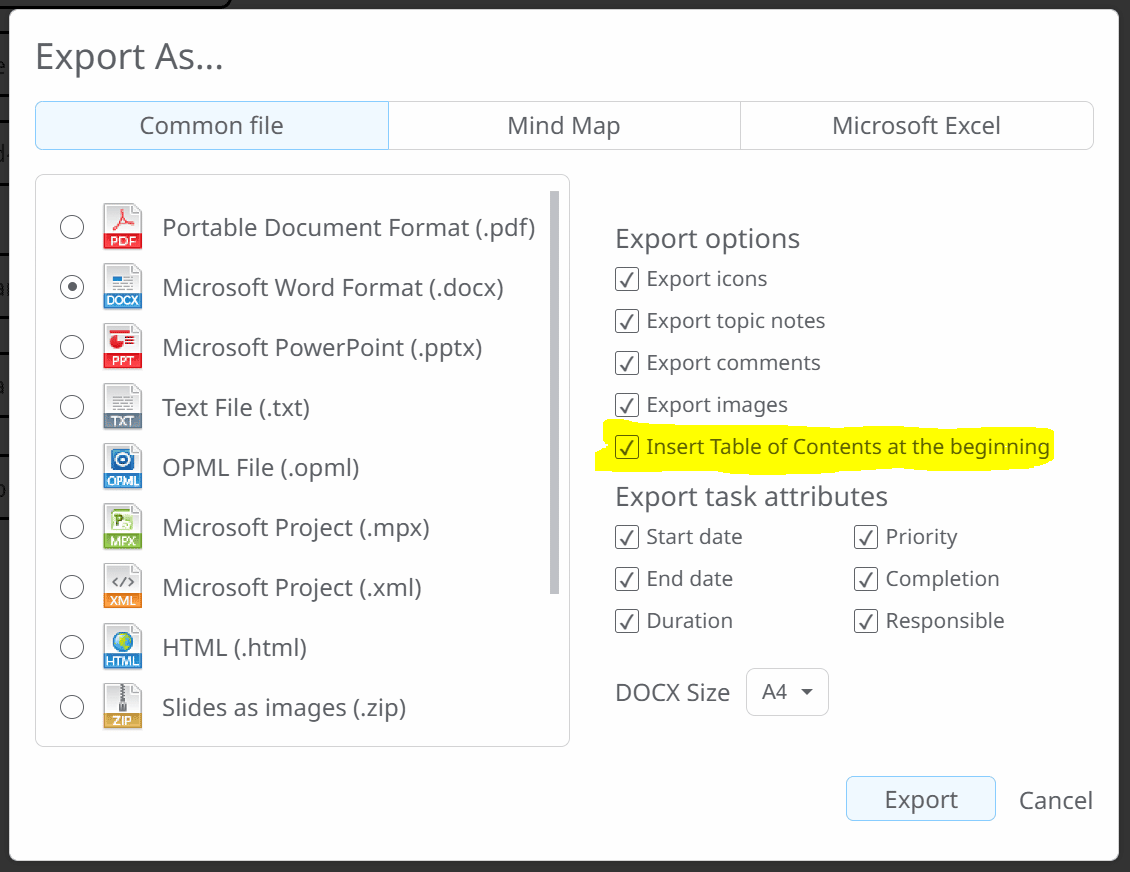
The Table of Contents is generated at the start of the document. You can then move this to after the title page and summary in your word processor.
3. Sample outline: blog post
This is the outline for the first blog post about how to write an outline with Mindomo.
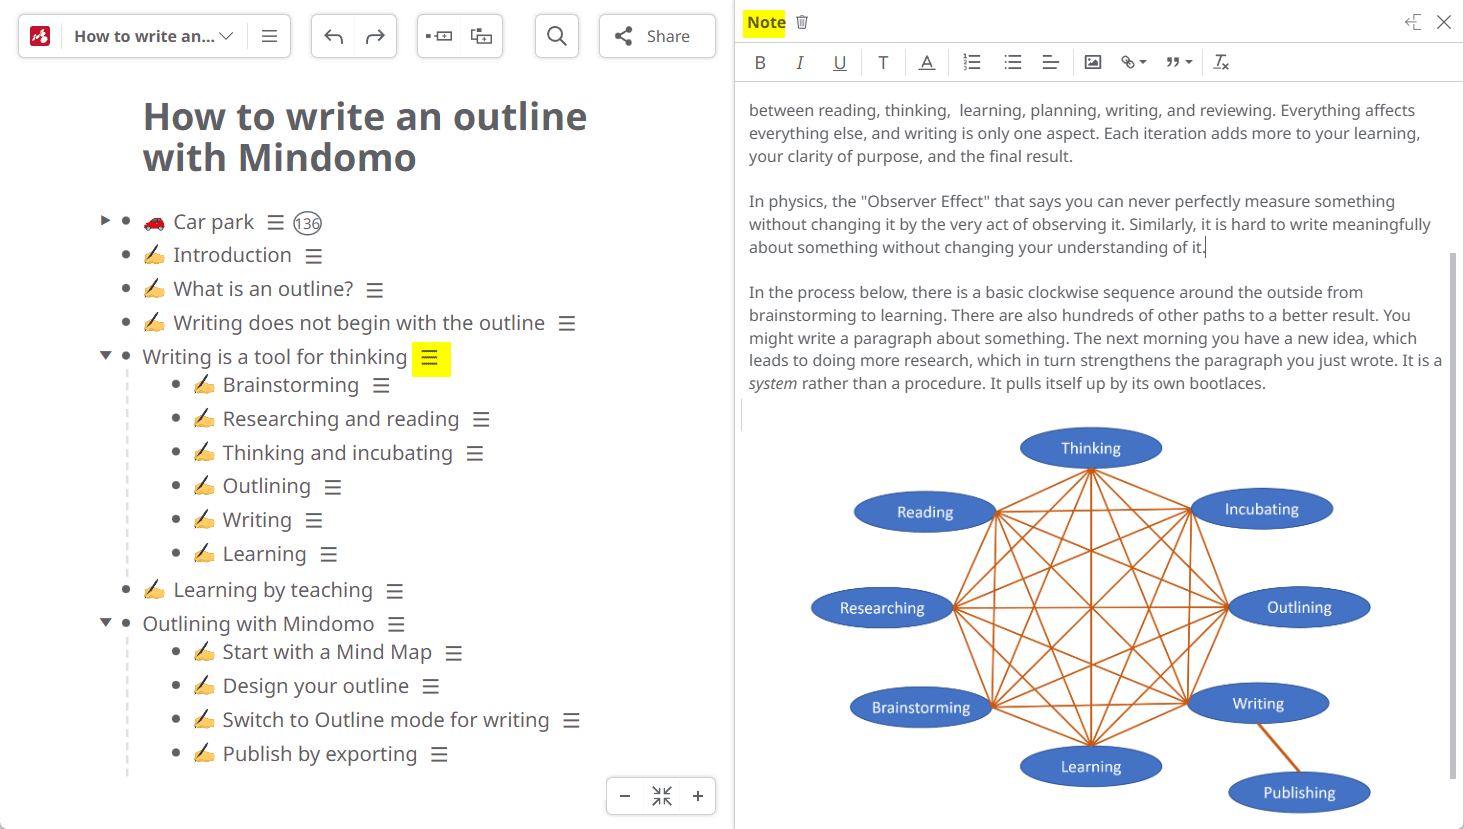
You can compare this outline with the published article to see how it was put together.
All the items in the outline have a Topic Note associated with them. In the screenshot above, the topic “Writing is a tool for thinking” is selected, and its note is in view. You can include images and text formatting in notes, and they are exported when you export the outline to Word.
All the research, notes, and ideas are under the topic “Car park”, marked with the car icon. This means I could hide all the research with a single click when working in Outline mode. For research, developing initial ideas, and collecting resources, I used the Mind Map view.
All the published items, which is the rest of the outline, are marked with the “writing hand” icon. Note that this icon is used at the lowest level that applies. I could have had some extra unpublished topics under “Outlining with Mindomo”. These could be hidden from the final version by not applying the icon.
Tip: how to export the outline
The writing process began with an empty mind map, to which brainstorming and research were added. As the ideas began to take shape, I could start to build an outline on the map. Once this outline had settled down, I could switch to Outline mode to write the paragraphs. Of course, there were many iterations and changes on the way. Near the end, I started making exports to Word to review it as a linear document. This resulted in some cosmetic and grammar changes. By the time I had started work in a word processor, almost everything was already in place. All the thinking and testing of ideas had been done before switching to the word processor.
To make the export for finalizing the style and layout, I clicked on the Search button and searched for the “writing hand” icon. This hides the “car park” topic, leaving just the content for export. I then exported it to Word and printed out the first draft. Things often look different on paper than on a screen.
After some more edits, I exported it again and finalized it in the word processor. This is only worth doing when the text is complete. Otherwise, you will be making minor changes (such as numbering or indentation) more than once if you need to export again.
Keep it smart, simple, and creative!
Author: Nick Duffill